Laravel Passport
Als Fortsetzung zum MyInput-Beispiel füge ich Laravel Passport hinzu.
Das Beispiel baut auf folgenden Artikeln auf: Laravel Beispiel - Schritt für Schritt und Laravel - Authentication und Authorization Beispiel
Einrichten laut: https://laravel.com/docs/passport
Hinzufügen von Passport mittels Composer:
vagrant@homestead:~/Code/Laravel$ composer require laravel/passport
Using version ^1.0 for laravel/passport
./composer.json has been updated
Loading composer repositories with package information
Updating dependencies (including require-dev)
dann in der Konsole: php artisan migrate
vagrant@homestead:~/Code/Laravel$ php artisan migrate
Migrated: 2016_06_01_000001_create_oauth_auth_codes_table
Migrated: 2016_06_01_000002_create_oauth_access_tokens_table
Migrated: 2016_06_01_000003_create_oauth_refresh_tokens_table
Migrated: 2016_06_01_000004_create_oauth_clients_table
Migrated: 2016_06_01_000005_create_oauth_personal_access_clients_table
und php artisan passport:install
vagrant@homestead:~/Code/Laravel$ php artisan passport:install
Encryption keys generated successfully.
Personal access client created successfully.
Client ID: 1
Client Secret: ????????????????????????????????????????
Password grant client created successfully.
Client ID: 2
Client Secret: ????????????????????????????????????????
Anpassen der Datei: app/User.php, hinzufügen von:
<span style="font-size:14.4px;">use Laravel\Passport\HasApiTokens; und  HasApiTokens,

<?php

namespace App;

use Laravel\Passport\HasApiTokens;
use Illuminate\Notifications\Notifiable;
use Illuminate\Foundation\Auth\User as Authenticatable;

class User extends Authenticatable
{
    use HasApiTokens,Notifiable;

    /**
     * The attributes that are mass assignable.
     *
     * @var array
     */
    protected $fillable = [
        'name', 'email', 'password',
    ];

    /**
     * The attributes that should be hidden for arrays.
     *
     * @var array
     */
    protected $hidden = [
        'password', 'remember_token',
    ];

}</span><span style="font-size:.9rem;"> </span>
Datei: app/Providers/AuthServiceProvider.php
use Laravel\Passport\Passport; und Passport::routes();

<?php

namespace App\Providers;
use Laravel\Passport\Passport;
use Illuminate\Support\Facades\Gate;
use Illuminate\Foundation\Support\Providers\AuthServiceProvider as ServiceProvider;

class AuthServiceProvider extends ServiceProvider
{
    /**
     * The policy mappings for the application.
     *
     * @var array
     */
    protected $policies = [
        'App\Model' => 'App\Policies\ModelPolicy',
    ];

    /**
     * Register any authentication / authorization services.
     *
     * @return void
     */
    public function boot()
    {
        $this->registerPolicies();
        Gate::define('isadmin', function ($user) {
            return $user->role_id == "1";
        });
        Passport::routes();
	Passport::tokensExpireIn(now()->addDays(15));//365 is default
	Passport::refreshTokensExpireIn(Carbon::now()->addDays(30));
	Passport::personalAccessTokensExpireIn(now()->addDays(365));//365 is default
    }
}<br>
Datei: config/auth.php
'api' => [
'driver' => 'passport',

...
    'guards' => [
        'web' => [
            'driver' => 'session',
            'provider' => 'users',
        ],

        'api' => [
            'driver' => 'passport',
            'provider' => 'users',
        ],
    ],

...<br>
Für eine schnelle GUI-Integration können noch folgende Dateien angepasst werden:
resources/assets/js/app.js
/**
 * First we will load all of this project's JavaScript dependencies which
 * include Vue and Vue Resource. This gives a great starting point for
 * building robust, powerful web applications using Vue and Laravel.
 */

require('./bootstrap');

/**
 * Next, we will create a fresh Vue application instance and attach it to
 * the page. Then, you may begin adding components to this application
 * or customize the JavaScript scaffolding to fit your unique needs.
 */

Vue.component('example', require('./components/Example.vue'));

Vue.component(
    'passport-clients',
    require('./components/passport/Clients.vue')
);

Vue.component(
    'passport-authorized-clients',
    require('./components/passport/AuthorizedClients.vue')
);

Vue.component(
    'passport-personal-access-tokens',
    require('./components/passport/PersonalAccessTokens.vue')
);

const app = new Vue({
    el: '#app'
});<br>
Da wir die Datei home.blade.php in einem vorigen Beispiel überspringen, also nach dem Anmelden direkt auf unser myinputs-Beispiel gehen, füge ich folgenden Quellcode in die Datei: views/myinputs/index.blade.php
<passport-clients></passport-clients>
<passport-authorized-clients></passport-authorized-clients>
<passport-personal-access-tokens></passport-personal-access-tokens>

..
            <!-- we will also add show, edit, and delete buttons -->
            <td>

                <!-- show the myinput (uses the show method found at GET /myinputs/{id} -->
                <a class="btn btn-small btn-success" href="{{ URL::to('myinputs/' . $value->id) }}">Show this Myinput</a>

                <!-- edit this myinput (uses the edit method found at GET /myinputs/{id}/edit -->
                @can('isadmin')
                  <a class="btn btn-small btn-info" href="{{ URL::to('myinputs/' . $value->id . '/edit') }}">Edit this Myinput</a>

                  <!-- delete the myinput (uses the destroy method DESTROY /myinputs/{id} -->
                  <form action="./myinputs/{{$value->id }}"  onsubmit="return confirm('Are you sure to delete: {{ $value->string}}')" method="POST">
                      {{ csrf_field() }}
                      {{ method_field('DELETE') }}
                      <button type="submit" class="btn btn-danger">
                          <i class="fa fa-btn fa-trash">Delete</i>
                      </button>
                  </form>
                @endcan

            </td>
        </tr>
    @endforeach
                <passport-clients></passport-clients>
                <passport-authorized-clients></passport-authorized-clients>
                <passport-personal-access-tokens></passport-personal-access-tokens>
..<br>
zu guter Letzt noch folgende Befehle in der Konsole:
php artisan vendor:publish --tag=passport-components
vagrant@homestead:~/Code/Laravel$ php artisan vendor:publish --tag=passport-components
Copied Directory [/vendor/laravel/passport/resources/assets/js/components] To [/resources/assets/js/components/passport]
Publishing complete for tag [passport-components]!
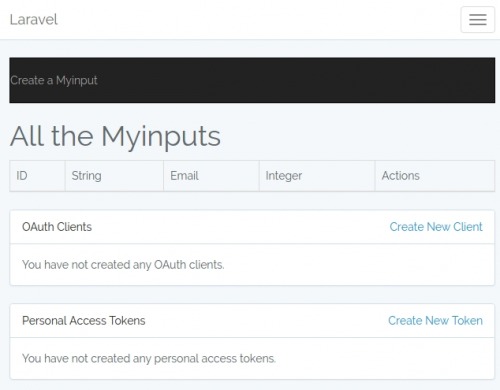
Sollten
nach dem Registrieren kann z.B. ein Personal Access Token erstellt werden:
npm install
und
npm run dev
Personal Access Tokens - Lifetime
app/Providers/AuthServiceProvider.php
in boot:
Passport::personalAccessTokensExpireIn(now()->addDays(3650));//365 is default
API/routes
Hinzufügen der API zum jeweiligen Aufruf
Route::get('/test', function () {
    return("test");
})->middleware('auth:api');
Zugriff von PowerShell
Zugriff mittels Personal-Access-Token
Invoke-RestMethod https:/myapp/api/user-Method Get -Headers @{"Authorization" = "Bearer $accessToken"}Password Grant
$result = Invoke-RestMethod http://localhost/oauth/token `
-Method Post -ContentType "application/x-www-form-urlencoded" `
-Body @{client_id=2;
client_secret="????????????x";
grant_type="password";
username="test@test.test"
password="???"} -ErrorAction STOP

$accessToken=$result.access_token
Invoke-RestMethod http://localhost/api/test -Method Get -Headers @{"Authorization" = "Bearer $accessToken"}
Client Grant
Voraussetzung
- php artisan passport:client --client
- app/Http/Kernel.php
-
use Laravel\Passport\Http\Middleware\CheckClientCredentials;

protected $routeMiddleware = [
    'client' => CheckClientCredentials::class,
];
-
- routes/app.php
-
Route::get('/test', function (Request $request) {
return("test");
})->middleware('client');
-
Powershell
$result=""
   $result = Invoke-RestMethod http://localhost/oauth/token `
    -Method Post -ContentType "application/x-www-form-urlencoded" `
    -Body @{client_id=4;
           client_secret="OyezJ3NHKSOVqTqiml4NgU8fkm6Iu6DxZzBJiAhU";
           grant_type="client_credentials";
        } -ErrorAction STOP

$result.access_token
$accessToken=$result.access_token
Invoke-RestMethod http://localhost/api/test -Method Get -Headers @{"Authorization" = "Bearer $accessToken"}
Refresh Token
$refresh = Invoke-RestMethod http://localhost/oauth/token `
-Method Post -ContentType "application/x-www-form-urlencoded" `
-Body @{client_id=2;
client_secret="???";
refresh_token="$($result.refresh_token)"
grant_type="refresh_token";
scope="";
} -ErrorAction STOP

Invoke-RestMethod http://localhost/api/user -Method Get -Headers @{"Authorization" = "Bearer $($refresh.access_token)"}
Beim Refresh wird der bestehende Token revoked und ein neuer ausgestellt, dies kann auch nachdem der Token abgelaufen ist erfolgen

 ({{pro_count}})
{{percentage}} % positiv
 ({{con_count}})